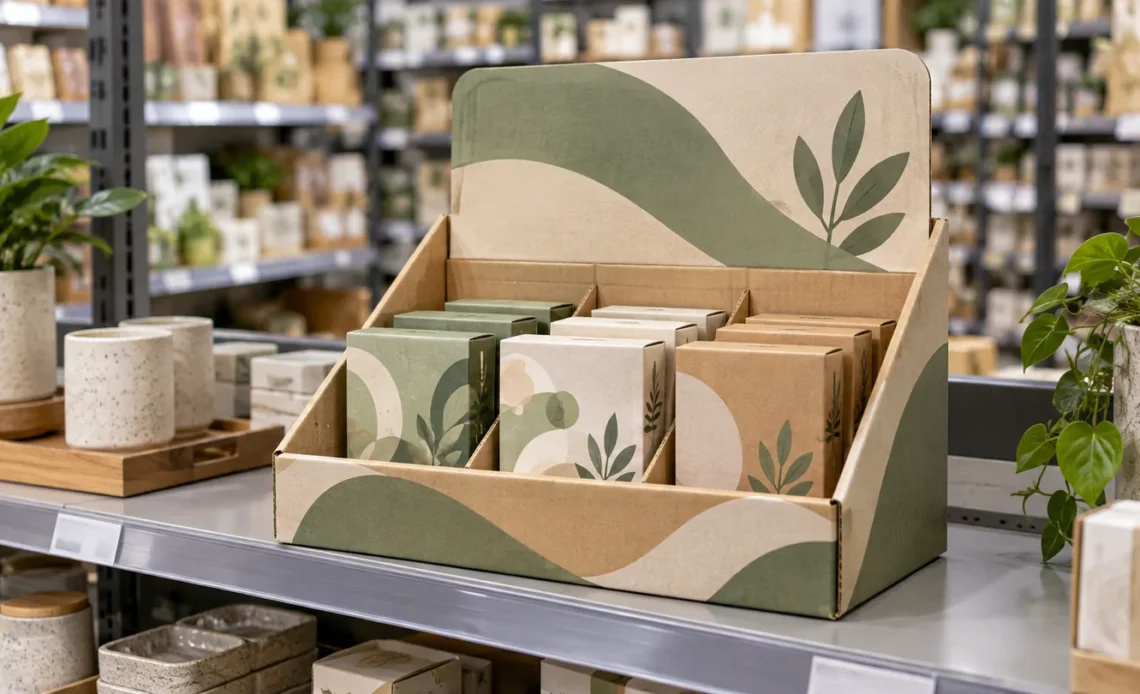
Custom display packaging works when it makes a product easy to notice, understand, pick up and restock without creating extra work for the store. The print matters, but structure comes first. A beautiful display that blocks the product name, tips forward when half empty or takes ten minutes to assemble is expensive decoration.
The practical goal is not simply to “stand out.” It is to fit a defined retail location, hold the correct number of units, survive distribution and present the information a shopper needs at the moment of choice.
Start with the retail job, not the finish
Before discussing foil, gloss or embossing, decide what the display must do. Is it a compact tray beside a checkout, a shelf-ready case that converts from shipping pack to display, a gravity-fed unit for small items, or a freestanding display for a launch?
Ask the retailer or sales team where the unit will sit, how much space is available, how often it will be replenished and whether staff must assemble it. Placement changes almost every design decision. A countertop unit competes for limited space and needs quick product access. A floor display needs greater stability and must remain presentable when stock runs low.
Choose a display format that matches the product
| Display format | Often suits | Main design risk |
|---|---|---|
| Counter display tray | Small cosmetics, snacks, accessories and trial-size products | Taking too much counter space or hiding products behind a high front lip |
| Shelf-ready tray or case | Products shipped in multiple units to a standard shelf | A tear-away section that damages the printed edge or takes too long to open |
| Gravity-feed display | Uniform, lightweight packs that can slide reliably | Products jamming, falling forward or failing to advance when stock is low |
| Hanging display | Light products with retail-ready hang tabs | Poor weight balance or holes and hooks that do not match the retailer’s fixture |
| Floor display | Launches, seasonal ranges and larger product quantities | Instability, difficult movement or a footprint the store cannot approve |
The number of product variations matters too. If several flavors, shades or sizes share one display, dividers and facings should make each option easy to identify without turning the unit into a cardboard maze. Article Thirteen’s guide to organizing product variants without confusing customers explains why differences should be visible and meaningful rather than merely numerous.
Build the specification around real measurements
A display should be designed around production samples, not optimistic measurements copied from an early spreadsheet. Measure the filled consumer pack at its widest, deepest and tallest points. Include closures, hang tabs, flexible pouches that expand and any tolerance created during filling.
- Finished dimensions and weight of each product unit
- Number of units, rows and product facings
- Approved shelf, counter or floor footprint
- Orientation during shipping and in-store use
- Total filled weight and centre of gravity
- Required dividers, inserts, tear lines or locking tabs
Leave enough clearance for staff and shoppers to remove a product comfortably, but not so much that units lean or look untidy. Test the display full, half full and almost empty. The last three products deserve a dignified retail life too.
Protect the product from warehouse to shelf
Display packaging still has to travel through packing, storage, transport and store handling. If the display doubles as a shipping case, opening it should not require a knife near the products or leave ragged panels facing shoppers. If it ships inside an outer case, check how much protection the outer packaging provides and whether the display can rub, crush or shift inside it.
The International Safe Transit Association’s design and testing guidance recommends matching testing to the real distribution environment and using representative products and packages. A desktop sample can confirm size and assembly. It cannot prove that a loaded display will survive compression, vibration, drops or changing humidity.
Design the visible panels around shopper questions
The header and front lip have limited space. Give each area one clear job. The header may establish the brand or product benefit. The front panel can identify the range or explain how variants differ. Side panels can carry supporting information that remains useful from an angle.
Do not let the display hide legally required information on the consumer package. The NIST discussion of principal display panels explains the importance of product identity and net-quantity information on packaged goods. The display and product label should be planned together so shoppers can see what they are buying without dismantling the unit.
Barcode performance needs the same practical attention. GS1 US advises using high-resolution barcode artwork, suitable placement, sufficient quiet space and a smooth printed surface. Decorative coatings should never turn checkout into an impromptu barcode treasure hunt.
Select materials and finishes for the actual conditions
Paperboard can suit small, lightweight countertop displays. Corrugated board is often considered when a unit carries more weight, travels as a shipper or needs greater rigidity. The correct grade depends on load, span, flute or board construction, print method, moisture exposure and expected time in store.
Finishes should solve a problem or support the brand. A coating may improve rub resistance. Lamination can change durability and appearance, but may also affect cost and the recyclability of the finished structure. Foil and embossing can create emphasis, yet neither repairs weak information hierarchy.
Be precise with environmental language. The FTC Green Guides caution businesses against broad, unqualified environmental claims. Specify whether a claim concerns the product, the display, an outer shipper or a particular percentage of recycled content, and retain evidence that supports it.
Review a prototype before approving production
A flat dieline is useful, but it cannot show how the display feels when assembled and loaded. Review an unprinted structural sample first, then a printed proof or production-quality sample when color, coating and registration matter.
- Time the assembly without help from the designer.
- Load it with the real product and move it as store staff would.
- Remove products from every row, including the last unit.
- Check visibility from the front, both sides and normal shopper height.
- Confirm that barcodes, dates and required product information remain usable.
- Repeat transport testing after structural, material or product changes.
If assembly needs an engineering degree and a motivational speech, revise the structure before asking a busy store team to live with it.
Compare suppliers using the same production brief
Send every supplier the same dimensions, material requirement, quantity, print coverage, finish, insert details, delivery location and deadline. When reviewing a supplier’s display box options, use the examples to narrow the likely structure, then request a dieline and prototype based on your actual product and retail placement.
Ask whether the quotation includes structural design, artwork checks, tooling, proofs, packing, freight and any overs or unders in production quantity. Compare the landed cost and approval process, not only the unit price. The cheapest quote becomes less charming when the display arrives late, damaged or unable to hold the product.
A useful display begins with a complete brief
Custom display packaging can improve product visibility and make merchandising easier, but it cannot guarantee sales. Start with the retail space, product dimensions, shopper information and supply route. Choose the format and material from those constraints, verify the claims printed on it, and test a loaded prototype before approving the run. That is less glamorous than choosing foil on the first call, but it is much more likely to produce packaging that works.
