Installing Bolon floors can be a bit of a challenging process, but it is definitely doable as a DIY project. If you have the right tools and follow the instructions carefully. Here in this article everything about Bolon floor and how to install vinyl DIY are discussed with general outline. Steps that you will need to take to install Bolon floors are also discussed. Stick to the article for complete guidance on installation of Bolon floors.
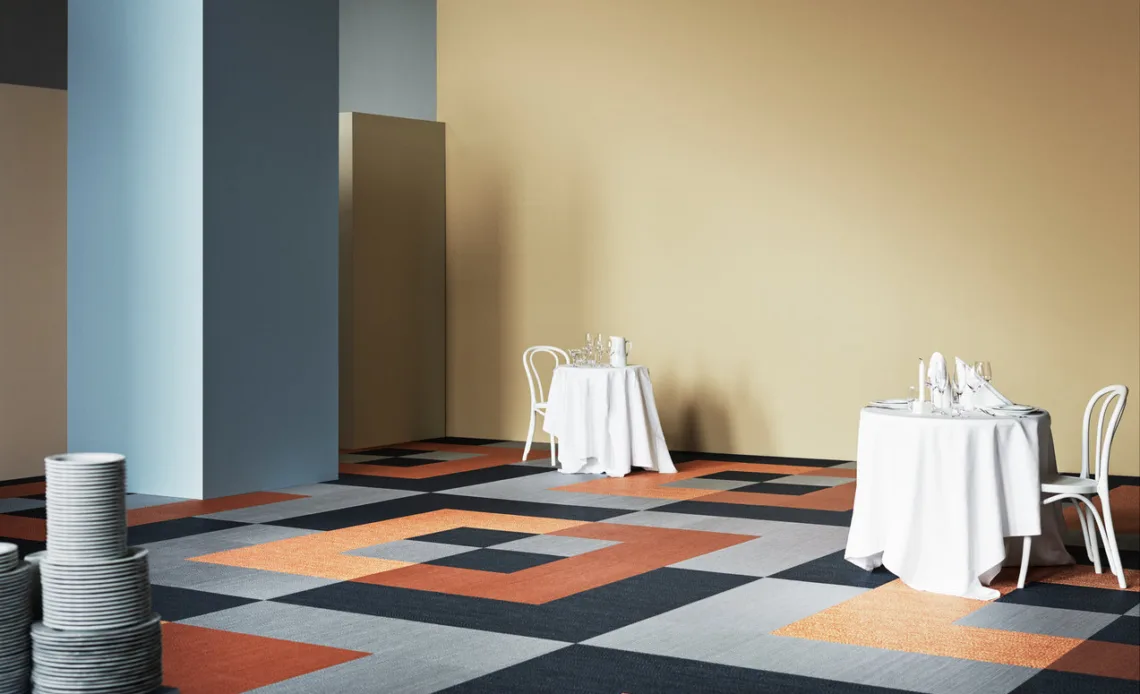
What are Bolon Floors?
Bolon is a brand of flooring that offers a range of flooring products. These products are made from a variety of materials, including woven vinyl, wood, and stone. The company is known for its innovative and sustainable flooring solutions. Which are designed to be durable, easy to maintain, and resistant to wear and tear.
Bolon floors are suitable for a wide range of applications, including residential, commercial, and public spaces. The company offers a variety of collections, each with its own unique style and design, so you can choose the flooring that best fits your needs and preferences.
Bolon floors are known for their durability, resistance to stains and spills, and easy maintenance. They are also environmentally friendly, as they can be recycled and repurposed at the end of their lifespan. Overall, Bolon floors are a popular choice for those looking for high-quality, stylish, and sustainable flooring options.

How to Install Bolon Floors DIY?
Bolon floor installation requires planning and high accuracy. Clean and repair the subfloor first. To reduce noise and cushion the subfloor, add underlayment. Bolon tiles or planks can be installed following the manufacturer’s instructions after the underlayment. Cutting around corners and obstacles. After installing tiles or planks, trim the floor edges to fit around walls and other obstacles. Protect the floor with manufacturer-recommended finishes and sealants.
Installing Bolon floors can be a DIY project if you have the right tools and follow the instructions carefully. Here are some tips for a successful do-it-yourself Bolon floors project:
- Plan ahead: Before starting your Bolon floors project, plan out the supplies, floor arrangement, and tools and equipment.
- Gather your tools and materials: gather your Bolon floors project tools and materials. This may include a laser level, straight edge, jigsaw or handsaw, rubber mallet, tapping block, and other manufacturer-recommended tools and materials.
- Follow the manufacturer’s instructions: Read and follow the manufacturer’s instructions to instal Bolon floors properly. This makes the floor durable and long-lasting.
- Take your time: Installing Bolon floors is not a quick project, so be sure to allocate plenty of time for the project and work at a pace that is comfortable for you.
- Seek help if needed: If you are unsure of how to complete any part of the project or if you encounter any problems. Don’t hesitate to seek help from a professional or ask for guidance from the manufacturer.
With careful planning, attention to detail, and a bit of patience, you can successfully install Bolon floors as a DIY project.
Steps Involved in Installation of Bolon Floors
There are several stages involved in the installation of Bolon floors, including:
- Preparing the subfloor
- Laying the underlayment
- Installing the Bolon tiles or planks
- Trimming the edges
- Finishing the floor
Let discuss each in detail
Preparing the subfloor
The first stage in installing Bolon floors is to prepare the subfloor. This includes cleaning the surface, checking for any damage or unevenness, and making any necessary repairs. A smooth, level, and clean subfloor is essential for a successful Bolon floor installation, as it will provide a stable base for the flooring and help to ensure that the floor is level and even. If the subfloor is not in good condition, the Bolon floor may not be installed correctly, which can lead to problems such as unevenness, cracking, or separation. Therefore, it is important to take the time to properly prepare the subfloor before proceeding with the installation of the Bolon floor.
Laying the underlayment
The second step in installing Bolon floors is to lay a layer of underlayment over the subfloor. Underlayment is a thin layer of material that is installed over the subfloor to provide an extra layer of cushioning and improve the overall feel of the floor. It can also help to reduce noise and provide some insulation, which can be particularly useful in areas such as basements or over concrete subfloors. There are several different types of underlayment available, including foam, cork, and rubber. It is important to choose the right type of underlayment for your specific needs and to follow the manufacturer’s instructions for installation. Once the underlayment is in place, you can proceed with the installation of the Bolon tiles or planks.
Installing the Bolon tiles or planks
The third step in installing Bolon floors is to install the Bolon tiles or planks. This involves laying the tiles or planks in a pattern that is consistent with the manufacturer’s instructions and making any necessary cuts to fit around corners and other obstacles. If you are using Bolon tiles, start by laying them along the longest straight wall in the room, using a straight edge or laser level to ensure that they are level. Then, work your way outwards from this wall, cutting tiles as needed to fit around corners and other obstacles. If you are using Bolon planks, start at the left side of the room and work your way towards the right, using a tapping block and a rubber mallet to gently tap the planks into place.
Trimming the edges
The fourth step in installing Bolon floors is to trim the edges of the floor to fit around the walls and other obstacles. Once all of the tiles or planks are in place, you will need to use a jigsaw or a handsaw to carefully cut the tiles or planks to fit around the edges of the room. This may include making cuts to fit around doorways, corners, and other obstacles. Trimming the edges of the floor is an important step in the installation process, as it helps to ensure that the floor is properly finished and looks professional. It is important to be precise and take your time when cutting the tiles or planks, as any mistakes can be difficult to fix.
Once the edges of the floor are trimmed, you can proceed to the final step in the installation process: applying any finishes or sealants recommended by the manufacturer to protect the floor.
Finishing the floor
Finally, you will need to apply any finishes or sealants that are recommended by the manufacturer to protect your new Bolon floor. This may include applying a sealant or wax, or adding a protective topcoat.
It’s important to follow the manufacturer’s instructions carefully and to use the proper tools and materials to ensure that your Bolon floor is installed correctly and will last for years to come.
Conclusion
This article provides detailed instructions on how to install Bolon floors, a brand of flooring known for its durability, resistance to stains and spills, and easy maintenance. It covers the steps involved in preparing the subfloor, laying the underlayment, installing the Bolon tiles or planks, trimming the edges of the floor, and finishing the floor. It also offers tips for a successful DIY Bolon floors project and emphasizes the importance of following the manufacturer’s instructions carefully and using the proper tools and materials. Whether you are installing Bolon floors in your home or business, this article provides valuable information to help you achieve a professional, long-lasting floor installation.
FAQs – How to Install Bolon Floor?
Installing Bolon floors involves several steps, including preparing the subfloor, laying the underlayment, installing the Bolon tiles or planks, trimming the edges of the floor, and finishing the floor.
Cleaning Bolon floors is an important part of maintaining their appearance and longevity. To clean your Bolon floors, start by dusting and sweeping the floor regularly to remove dirt and debris. Then, use a vacuum cleaner with a soft brush attachment to remove any remaining dirt or debris. If you spill something on the floor, be sure to wipe it up immediately to prevent staining.
Overall, the cost of Bolon floors can range from around $3 to $8 per square foot, depending on the factors listed above. It is important to consider your budget and the specific needs of your project when deciding on the type and material of Bolon flooring to use.